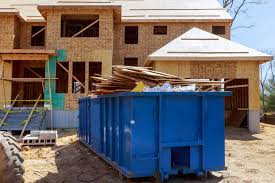
Home renovations are an exciting way to enhance your living space, but they often come with a significant amount of debris and waste. Whether you’re tackling a kitchen remodel, bathroom upgrade, or a full-home renovation, managing the waste effectively is crucial to keeping your project on track. One of the most efficient ways to handle this waste is through a residential dumpster rental. But how does this process work, and what should you expect? In this blog, we’ll walk you through the steps of renting a residential dumpster for your home renovation, helping you understand how it can simplify your project and keep your home clean and organized.
Step 1: Determine Your Needs
The first step in the residential dumpster rental process is determining your specific needs. This involves assessing the scope of your renovation project and estimating the amount of waste you’ll generate. Different types of renovations produce different kinds and quantities of debris, so it’s important to choose the right dumpster size and type for your project.
Assessing the Size and Type of Dumpster
Dumpsters come in various sizes, typically ranging from 10 to 40 cubic yards. The size you need depends on the scale of your renovation:
- Small Projects: For smaller projects, like a bathroom renovation or a small kitchen update, a 10- or 15-yard dumpster may be sufficient.
- Medium Projects: For medium-sized projects, such as a full kitchen remodel or a basement renovation, consider a 20- or 25-yard dumpster.
- Large Projects: For large-scale renovations, such as multiple room updates or a full-home remodel, a 30- or 40-yard dumpster may be necessary.
Consider the type of waste you’ll be disposing of as well. Residential dumpster rentals typically accept construction debris, old furniture, drywall, flooring, and other renovation materials. However, hazardous materials like chemicals or asbestos may require special disposal methods, so be sure to check with your dumpster rental provider.
Step 2: Schedule the Dumpster Rental
Once you’ve determined the size and type of dumpster you need, the next step is to schedule your residential dumpster rental. It’s advisable to book your dumpster a few days before your renovation project begins to ensure it’s available when you need it.
Choosing the Right Delivery Date
Timing is important when scheduling your dumpster rental. You’ll want the dumpster delivered on or just before the start date of your renovation to minimize any delays in your project. Coordinate with your contractor to determine the best time for delivery, ensuring that the dumpster is placed in a convenient location, such as your driveway or another accessible area.
Rental Duration
Most dumpster rental companies offer flexible rental periods, ranging from a few days to a few weeks. Consider the length of your renovation project when deciding how long to keep the dumpster. If you anticipate the project taking longer than expected, ask about the possibility of extending the rental period to avoid any rush.
Step 3: Dumpster Delivery and Placement
On the scheduled delivery date, the dumpster rental company will deliver the dumpster to your home. Proper placement is key to ensuring that the dumpster is both accessible and out of the way of your renovation activities.
Ensuring Proper Placement
Before delivery, clear the area where the dumpster will be placed, ensuring there is enough space for the dumpster and that it won’t obstruct any entrances or pathways. If you’re placing the dumpster on a driveway or street, you may need to obtain a permit from your local municipality, depending on the regulations in your area.
Protecting Your Property
To prevent damage to your driveway or lawn, consider placing plywood or similar protective material underneath the dumpster. This can help distribute the weight of the dumpster and prevent any potential scratches or indentations.
Step 4: Using the Dumpster During Your Renovation
As your renovation progresses, you’ll begin filling the dumpster with debris and waste. It’s important to follow the guidelines provided by your residential dumpster rental company to ensure proper use.
Loading the Dumpster
To maximize space, break down large items and load them evenly into the dumpster. Avoid overfilling the dumpster, as this can result in additional fees or the need to remove some items before pickup. Most rental companies have a fill line indicating the maximum level of waste allowed.
Safety Considerations
Always prioritize safety when using the dumpster. Avoid throwing heavy objects into the dumpster from a height, and be mindful of sharp or hazardous materials that could cause injury. If you’re unsure whether an item is safe to dispose of, consult your rental provider for guidance.
Step 5: Pickup and Disposal
Once your renovation project is complete, or the dumpster is full, contact the rental company to schedule a pickup. The company will come to your home, retrieve the dumpster, and handle the disposal of the waste.
Waste Disposal and Recycling
Many dumpster rental companies are committed to environmentally responsible disposal practices. They will sort through the collected waste, recycling materials where possible and properly disposing of non-recyclable items. This ensures that your renovation waste is managed in an eco-friendly manner.
Final Inspection
Before the dumpster is removed, do a final inspection to ensure all debris is inside and that the area around the dumpster is clear. This helps prevent any additional cleanup after the dumpster is taken away.
Conclusion
A residential dumpster rental is a convenient and efficient solution for managing waste during home renovations. By understanding the steps involved—from determining your needs and scheduling the rental to proper use and disposal—you can ensure a smooth and hassle-free experience. Whether you’re tackling a small bathroom update or a large-scale home remodel, a residential dumpster rental provides the space and convenience you need to keep your project organized and your home clean.


